5 Fun and Functional Squat Variations

Squats are both a compound and function exercise, which means they’re a must for fit folks. Let’s look at five of my favorite squat variations to liven up the standard squat.

You likely heard me (or people like me) toss around the term “functional movement.” In a nutshell, functional movements are exercises that relate to movements we do in our daily lives. Walking, lifting, bending down to pick things up, carrying objects, stuff like that. Unless you’re training for something with a particular variety of movements (dance, rock climbing, hockey, swimming) functional movement exercises are the most beneficial ones you can train because they’re immediately applicable to your everyday life.
Performing squats—or simply squatting—is one of the most important functional movements you can do. Movements such as walking, going up and down the stairs, sitting down and standing up, picking things up off the floor are aided by an increased ability to squat. And, of course, in return, those movements help to increase our squatting ability.
Practicing the squatting movement both strengthens the muscles in the lower limbs and improves your mobility in the knee, hip and pelvic floor. But, as I wrote in 5+ Benefits of Squatting and How to Prepare, if you’ve been wearing shoes with any type of heel and spending much of your day sitting in a chair, it’s entirely likely that you’re not currently capable of performing the squatting motion in a way that doesn’t create pressure in certain joints or cause pain. So, I encourage you to go back to that article and prepare yourself before you read any further.
For those of you who are ready to continue, let’s talk about how not all squats are created equal.
How to vary the squat
The most common ways we vary the squat exercise is by making changes to the width of our stance, our foot placement angle, hip depth, and by adding extra load (weights). These alterations create different techniques that lead to different loading conditions and different movements. These variations create many different and fun ways to perform the mighty squat!
But all these different movements also create many different opinions among therapists, coaches, and squatting experts about which squat exercise you should be doing. In my opinion, that question is flawed. Like I always say—the more the merrier. Just not too many, too soon.
A word of advice for novice squatters
A 2018 study—creatively named How to squat? Effects of various stance widths, foot placement angles and level of experience on knee, hip and trunk motion and loading—concluded, “Since limb alignment, as well as RoM (range of motion) of the lower extremities and the lumbar curvature are dependent on foot placement angles, the exact squat protocol should be chosen wisely, where caution should be taken when performing squats in extreme positions.” This boils down to the advice that novice squatters should stick to: a narrow stance width with a small foot angle. But as you get stronger and more comfortable with the squatting motion, the world is your squat rack!
Squat variations
So let’s break a few of the most popular variations down—right after I give the standard PSA.
Just like any new movement, proficiency takes time to develop. If you try some of these variations (or stick to the basics) and experience pain or discomfort, I suggest that you have a qualified coach evaluate your form and technique. Or, if you have had knee, hip or pelvic floor issues in the past, you may want to see a licensed physiotherapist or sports doc before you proceed. A good workout can create muscle soreness but it should not create pain. Ok? Ok! Let’s dive in.
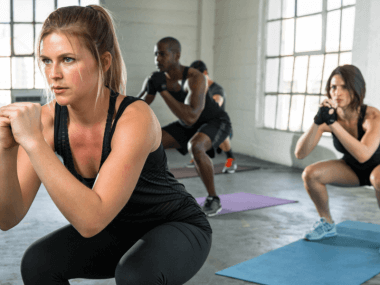
Body weight squats
This should be your go-to, favorite, everyday squat. It is the most functional, and it requires zero exercise equipment. Unless you’re wearing a particularly restrictive pair of pants, you can do these anytime and anywhere.
Start in what we will call your “basic squat form” with your feet hip-width apart, and your feet in a (mostly) parallel position. Then squat down as far as you can comfortably go or until your knees reach a 90-degree angle. Aim to keep your shins perpendicular to the floor by keeping your weight on your heels. I like to tell my clients to start the squatting movement by sticking their butt out behind them. Then start bending your knees and relaxing your pelvis.
PRO TIP: To help you maintain a flat back throughout the exercise and to stop your knees from tracking beyond your toes, do your squats facing a wall. If you faceplant into the wall or bash your knees into the wall … you need to adjust your form.
Sumo squats
You may also know this one as a plié if you have a dance or barre class background (as I do).
For this one, your feet are placed wider than hip-width apart, and your feet will be angled outward like a duck’s. Concentrate on keeping your shins perpendicular to the floor and your back flat—no hunching allowed in any of these variations.
Unlike the basic squat, your knees will be pointing outward at the same angle as your toes. This is going to get your inner thighs more involved in the movement. If you haven’t done these before, don’t get carried away, even if you’ve been doing the basic squat for a while. This inner thigh involvement can activate some previously dormant stabilizer muscles.
PRO TIP: in this variation, you will need to push through your heels and focus on using your glutes (not just your thighs) as you stand back up.
Split and Bulgarian split squat
The split squat involves the same muscles as the regular old squat. Still, since this one uses a single leg for its foundation, it builds significant functional strength that transfers very well to some solid walking, hiking, and running power. Split squats also challenge your balance, which is a big reason why I include them in my exercise regimen. If you read my article called Going Barefoot and 8 Other Ways to Improve Balance, you’ll know that balance isn’t something that we should take for granted.
To set yourself up for a split squat, stand normally and take a long step forward like you would if you were about to do a lunge. Allow the heel of your back foot to come off the ground. Then, keeping your trunk nice and upright and your front shin perpendicular to the floor, lower yourself until your back knee almost touches the floor. You can pause for a second and then push your body back up to the starting position.
To make this squat “Bulgarian,” raise your back foot onto a bench or chair. Beware! Because your back leg and your lower back are essentially taken out of the picture, your body weight goes directly into your hips. This adds more weight to your front leg and places a new level of importance on your balance. If you have trouble balancing, you can hold on to a chair or the wall until you feel more stable. Safety first!
PRO TIP: Make sure both knees stay in line with your toes. Because one foot is more visible than the other, you may want to stand in front of a mirror.
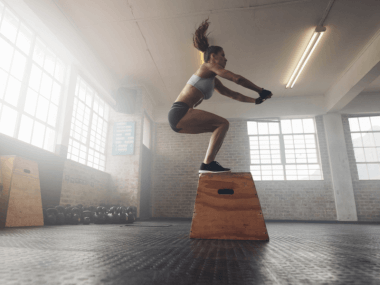
Pulse and plyometric squats (or squat jumps)
Start this one off like you’re doing a good old basic squat. When you get to the bottom of your squat, push yourself back up to the halfway point, then quickly lower yourself down again. Repeat this small but meaningful movement for a while and feel the burn.
Once you have been doing the pulse squat for a few weeks, you can try a plyometric or squat jump and really get your heart rate through the roof.
Start the same way you did the pulse squat, but instead of only coming up halfway, push yourself up and off the ground, exploding upward with all the power you can muster. Then land softly through your feet and immediately start the next squat. This movement softens the blow of gravity on your airborne self. As soon as you are at the bottom of the squat movement, blast up into the air again and repeat.
PRO TIP: focus on controlling each part of the movement of these squats. Your squatting form gets more and more important, the more complicated the squat gets. Don’t lose focus! All the alignment tips from the previous squats apply here.
Pistol squat
Most of the squats I’ve covered so far have been pretty easy to explain, but the pistol squat is kind of tricky. I encourage you to check out this video from the calisthenics master, Al Kavadlo to see how it is done properly.
Because most of us lack the strength and balance to go straight into a full-on pistol squat, here’s how I would advise you to start working on this movement.
Start sitting down on a chair with one foot flat on the ground and the other extended in front of you. As you start to stand up onto one foot, reach your arms out in front of you while simultaneously pressing your foot into the ground. Focus on keeping your core strong and stable. At the top of the movement, you should be standing on one foot with your arms and one leg pointing out in front of you. (Like a pistol, apparently?) Take a second to check your balance and then lower yourself slowly back onto the chair and repeat.
PRO TIP: if you find you lack the strength to lower yourself slowly back down to the chair and you plop down instead, don’t worry about it. But make it your goal to control your descent and do not attempt a full pistol squat without the chair until you can control the movement all the way up and down.
How many reps and sets? What about weight?
Depending on your experience with these movements, your current fitness, your current hip and knee mobility, and your fitness goals, you can choose your own number of sets and reps. You may even choose to add weights to these squat variations. But be careful and ease into it.
I would rather you “waste” a workout by using too low a weight or too few reps than to end up in pain for days or, worse, injured. So, instead of prescribing you “three sets of 15 reps with 20 pounds in each hand” (which is a pretty standard prescription), I am going to trust that you can and will start slowly with a few bodyweight-only squats and then do some experimenting and arrive at the perfect workout for you, at your current fitness and comfort level.
Don’t just listen to the “expert on the internet,” listen to your body.

About the Author

Brock Armstrong was the host of the Get-Fit Guy podcast between 2017 and 2021. He is a certified AFLCA Group Fitness Leader with a designation in Portable Equipment, NCCP and CAC Triathlon Coach, and a TnT certified run coach. He is also on the board of advisors for the Primal Health Coach Institute and a guest faculty member of the Human Potential Institute.