3 Variations for a More Effective Push-Up
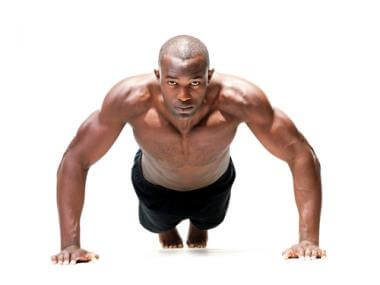
Push-ups are an awesome full-body exercise that activates the knee joints, hip joints, pelvis, and spine along with the more obvious muscles on the back of your arms, chest, shoulders, biceps, and back. Plus they can be made even more awesome by throwing in some basic (and not so basic) variations.
In a recent post called Want a Bigger Chest? 3 Key Tips and a Workout, I explained how, despite the fact that the pectoral muscle is technically broken up into only two parts (major and minor), it is actually best to train your chest by thinking of it in three pieces—upper, middle and lower chest. This makes it easier to plan your workouts and to target the portion of your chest that you want to build.
Sure, you could hit the weight bench and do some incline flyes, neutral dumbbell presses, and a few decline cable presses, and activate the majority of your chest just by those exercises. But given that push-ups are such an amazing full body exercise, one that doesn’t require any equipment or even much space, how can we apply this same approach of targeting specific parts of our pectoral muscles to push-ups? By changing a few variables:
- The angle of our body
- The distance between our hands
- The position of our hands
Let’s look at each of these in more detail.
1. The Angle of our Body
Get down into a push-up position and then look at the height of your head relative to your feet. If your head is higher than your feet, you are in a decline position. If your feet are higher than your head, this is the equivalent of being in an inclined position on a weight bench. That means, if you put your feet up on a bench, chair, stair, ball, or whatever, you can do push-ups that are targeting your upper chest. If you reverse that and instead put your hands on that raised surface, you can do push-ups that target your lower chest muscles. Thanks to good old gravity, a foot-elevated push-up also puts more stress on your upper body and less on your legs.
To make this version even more difficult, do your feet-elevated push-ups on your fists, rather than your flat hands. Using your fists will create a smaller surface area that is in contact with the ground, increasing the balance that is required from many of your smaller arm muscles.
When your hands are higher than the rest of your body during the push-up, you will work more of your lower chest and abs. Also, if you use an unstable surface (like a yoga or stability ball) as the elevated surface, you can really increase the amount of work that your triceps do. Plus, the front and sides of your abs will work harder due to that unstable surface.
2. The Distance Between our Hands
Generally, when we do a regular (or military) push-up, our hands are basically directly beneath our shoulders. If we vary that position, we can again target different parts of the chest.
The closer your hands are together, the more we work the middle of the chest. The farther our hands are apart, the more we focus on the outer muscles of the chest (anterior deltoids and pectoralis minor). There are other differences as well (the closer grip push-up engages the triceps and wide grip works the biceps) but for now, let’s focus on the chest.
To do a proper narrow grip push-up, simply move your hands slightly closer together, and as you perform the push-up, focus on ensuring that your elbows gently brush past the sides of your rib cage, rather than flaring out and away from your body. To do a wide grip push-up, move your hands out past your shoulders and allow your elbows to flare out a bit as you perform the movement.
3. The Position of our Hands
Moving your hands higher or lower than your shoulders can also change the chest muscles that are being activated. I especially enjoy seeing how close to my hips I can position my hands and still manage to do a pushup or two.
When you shift your torso forward during the push-up, you use more of your chest and less of your triceps compared to a normal push-up position. To do this, begin the push-up with your hands placed farther back and closer to your ribcage than you normally would. You may need to work on this one for a while—it can be tricky to find the right balance at first.
You can also reverse that position for another variation. Shift your torso back during the push-up, instead of forward, so you can use less of your chest and more of your triceps. Begin this version with your hands about six to twelve inches farther out in front than you would normally place your hands.
I promise that once you get to know (and love) these push-up variations, you can consistently sprinkle them into your workout routine whether it is at home, at the gym, at work behind your desk—or anywhere that you have room to drop and give me 20!
If you are an audio fan, don’t forget to subscribe to the Get-Fit Guy podcast on Apple Podcasts, Stitcher, Spotify, Google Play or via RSSopens XML file . For more info, tips, and to join the conversation, head over to Facebook.com/GetFitGuy, twitter.com/getfitguy or BrockArmstrong.com.


