The 5 Key Exercises that will Keep You Fit
Do you like your exercise time to be fun and unstructured? Here are Get-Fit Guy’s five essential exercises you can do almost anywhere and at any time to keep strong and fit—no gym memberships or yoga pants required.
The five key exercises that I would love to see all of us modern-convenience-loving, chair-dwelling, workaday grumblers incorporate into our lives are:
- Push-ups
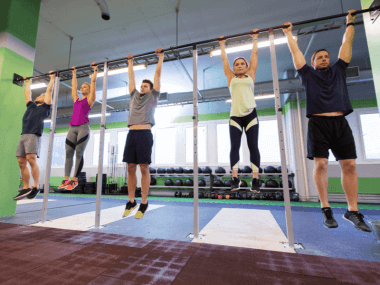
- Pull-ups
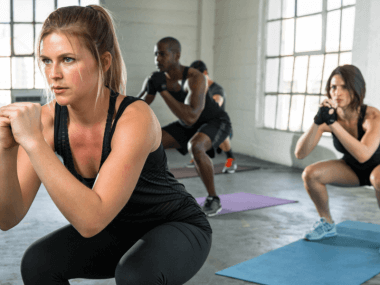
- Squats
- Planks
- Rotations
Now, before you even say it (or tweet it at me), I know many of you are thinking, “But Brock, I can’t even do one push-up” or “I haven’t even tried a pull-up since college!”
Well, never fear. You don’t have to be a push-up master, nor do you need to break the world’s record for the longest-held plank (which was set by a 62-year-old), to do this workout. You just need to be realistic and shake that all-or-nothing atitude.
Start where you are
There is a quote from author Ijeoma Umebinyuo that goes “Start now. Start where you are. Start with fear. Start with pain. Start with doubt. Start with hands shaking. Start with voice trembling but start. Start and don’t stop. Start where you are, with what you have. Just … start.”
I think many of us need to apply this philosophy to our fitness planning. Sure, we’re surrounded by workout advice that says “Do 15 reps of this exercise” or “Do 10 reps of that exercise.” But what do you do if we can only do one? Or maybe none? Well, you modify the movement and start where you are—not where the Internet says you should be, but where we are right now on your very own fitness journey.
Let’s break down these five key movements into some manageable versions.
Push-ups
Many push-up beginners go straight to the knee push-up because they are more accessible than regular (or military-style) push-ups. But I think that putting your knees down on the ground changes the geometry of your body too much. When you place your knees on the ground, you basically change the length of your fulcrum—the angle of your lever—and mess with how much your glutes and abs are involved.
Don’t get me wrong, I think knee push-ups are a different and fine exercise, but I think a better way to ease into a push-up is to perform wall or incline Push-ups.
-
To perform a wall push-up, stand facing a wall with your toes a couple of feet away. Place your hands against the wall and do the push-up movement.
-
To perform an incline push-up, keep your feet on the floor and plant your hands on a table, countertop, chair, stair, or anything else that is raised above ground level and do the push-up movement.
As you get stronger and start to master the push-up movement, you can move your hands to a surface that is closer and closer to the ground. I would say that once you can do 10-12 pushups comfortably at a particular height, you’re ready to move lower.
If you are already a push-up master (or once you have turned yourself into a push-up master), you can make the regular old push-up harder but either doing a decline push-up or adding a resistance band into the mix.
-
To perform a decline push-up you do the opposite of the incline push-up. Instead of putting your hands on a raised platform, put your feet on one.
-
To perform a resistance band push-up, get yourself into a push-up position. Place a length of resistance band across your back and hold the ends in each hand. Depending on how tightly you wrap the band, you not only fight gravity but the resistance from the elastic.
Pull-ups
If you haven’t done a pull-up since high school (or perhaps since never), here’s how I propose you learn.
Pull-up progression:
- Keep your home pull-up bar low (around shoulder height) so you able to keep your feet on the ground throughout the entire pull-up. If that is not possible, place a chair under the bar that you can stand on.
- Do as many of these self-assisted pull-ups as you can, then rest for 60 to 90 seconds and go again. Do three to five sets a few times a week.
- Make sure you challenge yourself by switching the load from your legs to your arms more and more. Remember that the best and fastest way to build a muscle is to use it to failure, let it recover, and then take it to failure again.
- After a few weeks, move the bar higher (or move the chair out of the way) and attempt a full bodyweight pull-up.
- Once you can do three full bodyweight pull-ups, move the bar up to proper height and banish the chair.
- Stick to the same schedule as before but do five sets of as many pull-ups as you can, even if the last set (or two) is a single noisy and ugly pull-up. You will start to see gains faster and faster now.
- Keep at it—and remember that your chin must clear the bar for it to be a real pull-up.
Remember that the best and fastest way to build a muscle is to use it to failure, let it recover, and then take it to failure again.
If you are already a pull-up master, you can add weight to your body. You can invest in belts built for this purpose, or simply clutch a dumbbell between your thighs. I like the dumbbell method because it adds some isometric leg contractions to your pull-ups. Win-win!
Squats
Remember that you should squat in whatever way feels most comfortable for you. As you get better at the squatting movement, your aim should be to improve your form and positioning. But please don’t force your body into any position it isn’t ready for. That might mean that you squat with a narrow stance or (like me) a wider stance. Maybe your toes are pointing straight forward or maybe (like me) they’re rotated out a bit. Let your own personal skeleton be your guide.
Focus on your range of motion first rather than immediately trying to squat a heavy load.
Also, remember to focus on your range of motion first rather than immediately trying to squat a heavy load. As long as you can maintain good form, squatting deeper with a lighter barbell, kettlebell (or no weight at all) is better for you than loading up a shallow and stiff squat.
If you haven’t squatted in forever, start by simply sitting down on a chair and standing back up again. Don’t pause too long in the chair, though; rebound up and out of the chair so you develop those muscles faster. Also, keep your back nice and tall, your neck long, and your eyes on the horizon. Don’t let your upper body collapse or slouch.
Once you can do 10-12 chair squats comfortably, move on to air or bodyweight squats. Focussing on using the posture you developed on the chair. Your goal now is to increase the depth of your squat over time.
Important
- The more vertical that your shins are during the squat (with your knees stacked above your ankles) and the more untucked your pelvis is, the more of your glutes you will use. We want to use our glutes, so keep those shins vertical and that pelvis aligned.
- How deep you can get yourself into a squat depends on a few things. Your own personal depth is based on how well you can keep your shin and pelvis in the correct position.
Planks
I highly recommend that you watch a how-to video and look at some planking images online if you have never done one before (here is a great video from Yoga15’s Abi Carver). But for those of you who prefer learning from a description, here you go:
- Lie face down on the floor (a soft mat or rug can make this more comfortable)
- Place your elbows directly under your shoulders and align your wrists with your elbows
- Push your body up so you create a straight and flat line from your toes to your head
- Keep your chin in close to your neck (think of holding a tennis ball under your chin)
- Engage your abs, like you are about to be punched in the stomach, and squeeze your gluteal (tailbone) and thigh muscles simultaneously
- Breathe normally
- Hold this plank position for a few seconds at first and increase the duration over time
- Rest and repeat
Important
- Keep your back flat (and your bum tucked in) to get the core working the way it should
- Keep your neck in a neutral position and your eyes on the floor (not on your reflection in the mirror or on your yoga neighbor)
- Keep your breathing, deep and slow. Breathe in through the nose and out through the mouth
If you can already hold a plank for minutes on end, you may want to make them harder by lifting a hand or foot off the ground. Planks taps, where you tap alternating feet or hands on the ground, are also a good challenge.
Rotations
I saved this one for the end because it’s probably the least familiar movement of the bunch. Rotation is simply your ability to twist your core all the way from your pelvis to your ribcage. It’s an often overlooked movement. I think overlooking it is a huge mistake.
When we walk, every step we take involves a rotation of the thoracic spine. When we run, that rotation is increased. When we use a broom to clean up a mess, we also involve rotation of the core and spine. And the list goes on. So, as a matter of injury prevention, I suggest training your rotation to keep it supple and strong.
My four favorite rotation exercises are:
- Woodchoppers
- Russian twist
- Side plank rotation
- Resistance band trunk rotations
1. Woodchoppers can be done with or without weight. I suggest starting with no weight.
To do a woodchopper start by squatting and twist to the left, holding your hands (or the dumbbell) on the outside of your left leg. Then lift the weight diagonally across your body until you’re twisted to the right with your hands (or the dumbbell) above your head. Then lower and twist the weight back down to the starting position to complete one rep.
2. The Russian twist can also be done with a dumbbell, medicine ball, or with no weight at all. Again, I suggest starting with no weight.
To do the Russian twist, sit down in a sit-up position, with your knees bent and your feet flat on the floor. Then, holding your hands (or a dumbbell) just out in front of your chest, sit back until you feel you can’t go any further without tipping over. Exhale as you twist to the left, allowing your right arm to cross over to the left side. Inhale and twist back to center. Then do the opposite side.
3. Side Plank Rotations can also be done with a light weight in your top arm, but that’s a pretty advanced technique. Use caution if you decide you want to try it.
To do a side plank rotation, drop to the ground and get on your right or left side in a plank position. Reach for the sky with your upper hand and then reach down and around through the space between your ribs and the floor. The twist back to neutral and reach for the sky again. Go back and forth until your abs give out and you start to shake, then do the other side.
4. Trunk Rotations can be done with a resistance band (as I will describe), but you can also use a cable machine at the gym.
To do the resistance band trunk rotation, anchor your resistance band at chest height around something sturdy. The grab it in both hands and step sideways away from the anchor. Extend your arms out in front of you and twist your torso away from the anchor until your arms are straight out to your side. Reverse the motion in a slow and controlled movement, don’t let the resistance band pull you over. Once you have fatigued that side, change sides and do it again.
Added to an active lifestyle
Adding these five key movements, a few times per week, into an otherwise active and movement filled lifestyle is a great way to stay fit and mobile. Finding some time in your day for these movements will also help keep you safe and injury-free while you hike, cycle, run, swim, jog, walk, dance, and play. And the best part is that these exercises don’t take a ton of time, require expensive gear, or neccessitate a trip to the gym.


